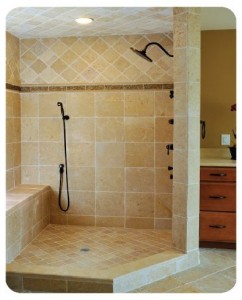
As we get older, lifestyle and health changes often present challenges making it difficult to stay in and enjoy your home. One improvement gaining momentum is removing a tub that is never or rarely used and replacing it with a shower, allowing for a more convenient and safe showering environment. Simple changes or even a complete overhaul can bring renewed enjoyment of old spaces. Ideal utilizes a variety of products to enhance the livability of your home and accommodate occupants in all stages of life. We have the Ideal solutions to create a one-of-a-kind bathroom just for you. Our 4-step guide will help you start thinking if a tub-shower conversion is right for your home.

STEP 1: PLAN
In the excitement of getting started with your bathroom remodel, it can be easy to get carried away in the accessories, colors and fixtures. It’s important to start with the fundamentals – the planning stage. Now is the time to measure, plan and research. Think about if you’d like to keep the toilet in the same location, or if you’ll need to move it out a bit to allow for a shower door swing. Most tubs are 60 inches wide, which is a good size for a shower. For shower depth, you should aim for about 34-36 inches from the tile wall to the future shower door. Try to keep 15 inches room from the center of the toilet to the shower glass to avoid feeling crowded.
STEP 2: SELECT YOUR SHOWER FIXTURES
There are hundreds of shower fixtures to choose from. Knowing what you want ahead of time can make the decision process easier. You’ll want to think about:
-Single-handle versus double-handle faucet options
-Incorporating a hand-held fixture in the shower
-Material and Finish: Chrome, stainless steel, nickel, brass or bronze
-Warranty of the fixtures
STEP 3: TILE AND GROUT OR WALL PANELS
Ideal works with a variety of manufacturers and price ranges. Whatever your choice, you’ll want to make sure the materials are installed properly.
Larger Tile Formats Versus Smaller Tile Formats
Larger tile is easy to clean but it can be slippery. If you’re thinking of putting larger tile in the floor of your shower, bring a sample home and test it out. This will give you a sense of how slippery it really is. Shower pan tile should be 1” x 1” or 2” x 2” for good traction. Larger 3” x 3” or 4” x 4” can be used, but be careful! It can be slippery and should always be non-glazed or non-polished stone.
STEP 4: WATERPROOFING AND DRAINAGE
Properly sealing the shower floor from water leaks will help protect your home from problems associated with water leaks, like wood rot, drywall damage and mold. Hot mops are prepared onsite and are the best way to waterproof the shower pan. A standard drain may not be sufficient to stand the test of time. To ensure your shower remodel lasts for many years, select a high quality and durable drain.
Contact Ideal today to schedule your free remodel estimate. Even if you’re just getting started in the process and need ideas, our remodel experts are happy to stop by for your free consultation. You can reach us by phone at (619) 583-7963 or email ideal@idealsvc.com
.


 FREE Live Music and Family Fun at Allied Gardens First Fridays The next Allied Gardens First Fridays Summer Concert in the Park is just around the corner. Grab your lawn chairs, bring a picnic, and get ready to meet your
  Ideal Plumbing Heating Air Electrical Named Winner of 2023 Better Business Bureau Torch Awards for Ethics in San Diego (San Diego, CA – September 15, 2023) Better Business Bureau Serving the Pacific Southwest (BBB) has named Ideal Plumbing Heating